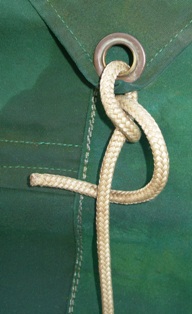
This column shows the basic "single" version used on the shortest lines.
(It is like tying a clove hitch, but doing it around a line rather than around a post or ring.)
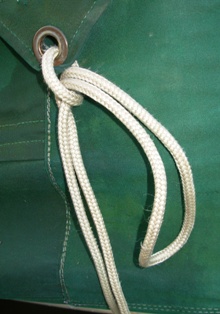
This column shows the version used on the longer lines.
This has two benefits; (i) you don't have to thread loads of single line when forming the knot, (ii) it leaves much less line dangling.
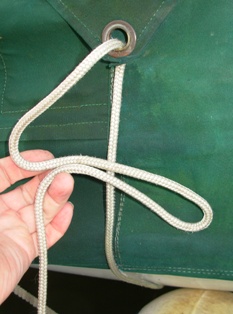
(1) Run the end of the line up through the eyelet.
Now pull it down to the left as you take up the slack in the "standing
line" under the hull.
(The line which takes the load is known as the Standing Line)

This starts just like the basic version on the left.
(1) Run the end of the line up through the eyelet.
Now pull it down to the left as you take up the slack in the "standing
line" under the hull.
Form a closed "bight" (loop) in the line to create about 18 inches of doubled line which will be used to tie the knot.
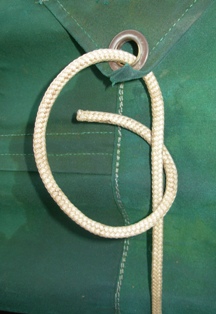
(2) Bring the working end (ie, the free end, the bit you manipulate)
around from left to right in front of the standing part,
then begin to pass it from right to left behind the standing part (ie
against the canvass).
The bight is now your "Working end".
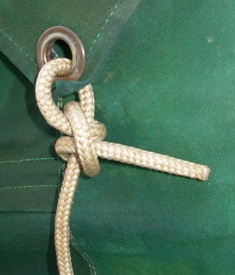
(2) Bring the end of the bight around from left to right in front of
the standing part,
then begin to pass it from right to left behind the standing part (ie
against the canvass).
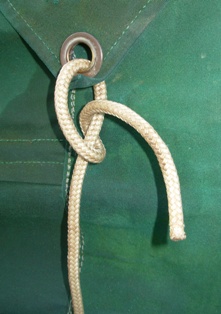
(3) As you do so, bring the end of the bight toward you through the loose loop which had formed. (Just like the "single" version)
(4) Take up the slack.
(You have now tied a half-hitch. You are about to tie a second one.)

(4) Take up the slack.
(You have now used a bight to tie a half-hitch. You are about to tie a
second one.)
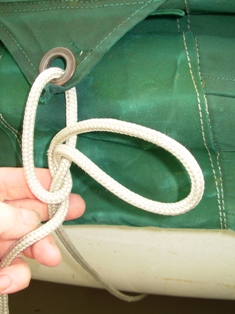
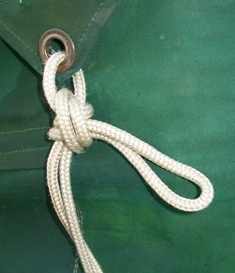
(5) Holding the bight a little lower than before, repeat (2) & (3), ie. begin to pass it from right to left behind the standing part, as in (2), and once again, as you do so, bring it through the loop you had just created (as in 3).
(6) Pull tight.
(By tying the second half-hitch you have effectively tied a clove hitch.)
Re-check the standing part (under the hull) is not slack.
Tuck any excess line under the canvass and into the boat.
Done!
When you are confident with this, try the version in the right-hand column.
(6) Pull tight.
Re-check the standing part (under the hull) is not slack.
Tuck any excess line under the canvass and into the boat.
Keep practising!
Pass the bight through the orifice and complete the two half hitches with the remainder of this bight as above
This is not practicable or advisable with our cover, due to the relative sizes of eyelet and line.